
In the previous article, "Beginner's guide to Kubernetes," we looked into the basics of Kubernetes and setting up and running Kubernetes in a local machine. There we had briefly discussed Kubernetes objects called Services. Services are Kubernetes resources that enable network access to Pods. In this article, we will look deeply into the concepts of Kubernetes Services and its different types. We will also look into Kubernetes Ingress, which is not a service but is another way of routing traffic to your services and your cluster.
Kubernetes Services
As we know, a Kubernetes cluster consists of a set of node machines, running containerized applications inside objects named Pods. The pods are grouped based on the type of service they provide into various groups. Pods must be able to accept connections in some way, from your cluster or from outside your cluster.
In the case of external access, we know that pods inside the cluster are present inside an internal pod network and cannot be accessed by the node’s IP address. A user should be able to communicate with the application using the IP address of the node.
In the case of internal communication, we know that each pod in the system is assigned with its own unique IP known as Pod IP. But these IPs are not static, as we know the pods can go down any time and new pods are created all the time in a cluster. So we cannot rely on these IPs for Internal communication.
So we need something that is consistent so that things outside or inside the cluster might be able to access it persistently. A Service is a Kubernetes object that acts as an endpoint for enabling the communication between various components within and outside the application. In other words, a service is a stable address for pods. The three important Service types in Kubernetes are:
ClusterIP
NodePort
LoadBalancer
ClusterIP
A full-stack web application typically is made up of different kinds of pods hosting different parts of the application. It may have a set of pods running a backend server, a set of pods running the front-end web server and a set of pods running a database, and so on. All these sets of pods need to communicate with each other. As we discussed, we can’t depend on the IP addresses of pods, since they are not static.
ClusterIP is a Kubernetes service type that is used to group pods together and provide a single interface to access them. For example, an incoming request by another service will be forwarded to one of the pods in the ClusterIP randomly.
Now let’s look at an example. Before creating the ClusterIP service we can start by creating a simple pod based on a definition file.
front-end-pod-definition.yml
As we can see our pod is simply a container that has the Nginx web server behind it. We have added labels app and type. Pod will be grouped into the type front-end. Next, we need to run the create command to create the pod.
Let's look at the ClusterIP service definition:
fe-clusterip-service-definition.yml
The Service definition has type as ClusterIP (it's not mandatory, as by default services are of kind ClusterIP). We can see that we have used the selector to link the service to a set of pods. Under ports, we have a target port and port.
The target port is the port where the front-end service is exposed which in this case is 80 and the port is where the ClusterIP service is exposed which is also 80.
Now we can create the service by the create command.
Let’s look at the service created
 We can see that in addition to the default Kubernetes ClusterIP a new ClusterIP of the name front-end-service is created with an IP address. The name of the service can be used by other pods to access it.
NodePort
NodePort is a Kubernetes service type that listens on a port on the node and forward requests on that port to a pod on the node. Let's look at an example.
We have a node with IP address 10.1.3.4.
The internal pod network of the node is in the range 10.244.0.0
The pod itself has an IP of 10.244.0.2.
The actual web server is running on port 80 in the pod.
Essentially, we want to forward requests coming to 10.1.3.4 to the pod.
When we create a NodePort service, the service is assigned a high port on all nodes. When a request comes in for node:port, it will act as a built-in load balancer and send the request to one of the pods at random.
Let’s create a NodePort service to forward the incoming request to the node to port 80 of the pod. Let’s start by creating a service definition:
nodeport-service-definition.yml
We can see three values in the ports section.
targetPort: The port on the pod where the actual web server is running, that is 80 in this case. Service forwards the requests to the target port. If no ports are provided in the spec, it will default to 80
port: Like all Kubernetes objects, the Service is a virtual server inside the node. Inside the cluster, it will have its own IP address. The ‘port’ is the port exposed to the NodePort service itself. This value is mandatory.
nodePort: The port on the node which is used to access the web server externally. These ports can only be in a valid range from 30000 to 32767. This is not a mandatory field, if it is not provided a free port from the range is selected.
Now we can create the service by the command,
 Let's check if the service is created.
Let's try to access the service using the IP of the node
Since I am using Minikube, the IP of the node is different from the local IP of the system. To get that value, type the command below in the terminal
Let's use curl to access the app using the NodePort in this IP
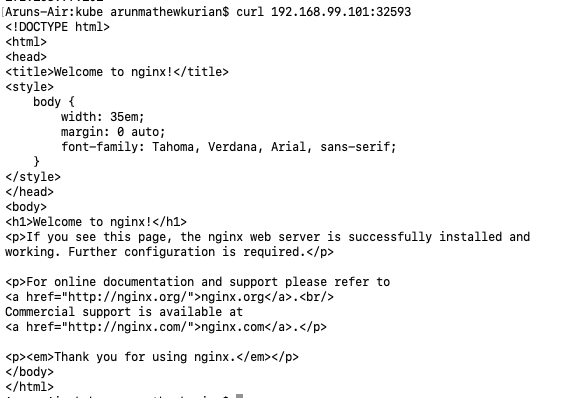 Great! We got a response from the pod.
LoadBalancer
Using nodePort we were able to expose our web app to the internet. However, there’s a problem - multiple instances of the web app can be deployed across multiple nodes in our cluster. To access this web app, we’d need to provide both a node IP and the node port to the user. In real life, it’s difficult to determine which node IP and node port should be provided to the user, manually. Instead, we need to have a load balancer to expose our web app to the internet.
A LoadBalancer is a service that provides (as you may have guessed) a load balancer for our application, in supported cloud providers. The service becomes accessible through a provided load balancer service. Most cloud providers like AWS, GCP, Azure offer this functionality. Once you create a service of type LoadBalancer, cloud providers will create a load balancer in the backend and generate a public IP address. This public IP can be used to access our web app from the public internet.
This is the standard way to directly expose a service to the Internet. It is similar to the NodePort where all the traffic on the port we specify will be forwarded to the service. Almost all kinds of traffic like HTTP, TCP, UDP, Websockets, gRPC etc can be sent to this service.
Let's look at an example definition file:
We can see that this is almost the same as a NodePort definition file.
Let's create the service with create command
Now let's look at the service that got created using the command.
 You can see that since I am using Minikube the value of the external IP is shown as <pending>. However, in an actual cloud setup, the IP will be generated and can be used to access the application. This is the IP that can be used by our users to access our web app from the internet.</pending>
Ingress Networking
We have seen in the Kubernetes services sections on how to expose our application to the outside world using the NodePort and LoadBalancer. If we only have to have a single service port we can use NodePort. In the case of multiple instances of the same service, we have to use the LoadBalancer.
But what if we have to add one more service to our node and access it from another URL. In this case, we will have to add another load balancer to our cluster. This means that each service exposed with a LoadBalancer will get its own IP address and we will have to pay for each of these load balancers which can be quite expensive.
An Ingress is used when we have multiple services on our cluster and we want the user request routed to the service based on their path. Consider an example, I have two services foo and bar in our cluster. When we type www.example.com/foo we should be routed to the foo service and www.example.com/bar should be routed to bar service. These routings will be performed by an Ingress. Unlike NodePort or LoadBalancer, Ingress is not actually a type of service. Instead, it is an entry point that sits in front of multiple services in the cluster. It can be defined as a collection of routing rules that govern how external users access services running inside a Kubernetes cluster.
Ingress is most useful if you want to expose multiple services under the same IP address, and these services all use the same L7 protocol (typically HTTP). You only pay for one load balancer if you are using the native GCP integration, and because Ingress is “smart” you can get a lot of features out of the box (like SSL, Auth, Routing, etc)
Ingress can be considered as the best way to expose multiple services under the same IP. Also, we should only pay for a single load balancer.
Let's see how Ingress works. Before we implement the Ingress we need to deploy a supported reverse proxy or load balancing solution like Nginx, Haproxy, or Trafik. Then we need to specify a set of rules to configure the Ingress. The solution we deploy is called an ingress controller and the set of rules that we configure are called as ingress resources. Ingress resources are created using definition files like the ones we used to create pods and deployments.
Ingress Controller
The Ingress controller is not a part of the Kubernetes cluster by default. So we cannot simply create an Ingress resource and expect it to work. There are a number of solutions available for Ingress. A few of them being GCE which is Google’s layers of HTTP load balancer Nginx, Contour, Haproxy Traefik, and Istio. Out of this, GCE and Nginx are currently being supported and maintained by the Kubernetes project.
The Ingress Controller is not just another load balancer or a reverse proxy service. They have additional components that monitor the Kubernetes cluster for new definitions and Ingress resources and configure the service accordingly.
We will be looking at Nginx as an example. Nginx controllers can be deployed just like another deployment into Kubernetes. Here is a sample definition file:
We can see that our deployment is named nginx-ingress-controller and has one replica. It contains a pod definition labeled as nginx-ingress. In the spec, we can see that we are using a special build of Nginx specifically built to be used as an ingress controller. This image has its own set of requirements. The first argument is the location of the Nginx program. Next, we have to pass a config map that stores the configurations of Nginx like keep-alive threshold, SSL settings, etc.
Config map definition sample:
We have also passed the environment variables carrying the pod’s name and the namespace it is deployed to. The service requires these values to read the configuration data of the pod.
Finally, we have specified the ports used by the ingress controller 80 and 443.
Next, let's expose the controller to the outside world using a service. Let's create a service of the kind NodePort:
Now that our controller is ready, let's look into the rules required to configure the Ingress.
Ingress Resource
An Ingress Resource is a set of rules and configurations applied to the Ingress controller. The rules can be specified to forward all incoming traffic to a single application or route the traffic to different applications. So in our example, when a user hits the ‘foo’ URL, then route them to the foo application or if the user hits the ‘bar’ URL, then route them to the bar application. Similarly, the request should be forwarded based on the domain name .
We can create an Ingress resource with a Kubernetes definition file. Let's look at some examples.
First, let's create a resource to route the incoming request based on the path:
We have specified an object of kind Ingress named ingress-foo-bar. And in the spec, we have defined two rules. The first rule will check if our request URL is of the foo type or bar type and serves the foo-service or bar service accordingly to the user. The backend part of the rule must contain the service name and a service port.
Now let's look at an example where the routing is based on the domain name:
Here we can see instead of paths in the rule we have hosts which are domain names. Also, we can see that splitting traffic by URL, has just one rule with two path specifications and splitting traffic by hostname have two rules with one path in each rule.
If the users type a URL that is not specified in the rule, they will be forwarded to a default URL that can be configured.
Wrapping Up
In this article, we have gone through the various Kubernetes Services and Ingress based on very simple examples. It should be noted that in real-life use cases can get more complicated and the Service solutions should be selected based on the requirements and complexity of the applications. Hope this article was helpful to you. Do check out the official documentation to find more examples and scenarios.
Get the most out of Kubernetes with Cortex
By providing you with unparalleled visibility into your services and infrastructure components, Cortex can help you get the most out of Kubernetes. The software and resource catalogs backed by the power of scorecarding not only provide deep insights, but allow you to establish and enforce best Kubernetes practices. Click here to learn more, or check out our click-through demo to see how easy it is to import your k8 services into Cortex!


