
This article is part of a Cookiecutter series - previously, we posted about standardizing project templates using Cookiecutter & creating your own SpringBoot service using an existing template.
Python is one of the most popular programming languages due to its clear & readable syntax, its scalability, and its versatility. It's one of those languages that most engineers know how to use, even if they haven’t directly worked with it. That’s why we’re choosing to focus this next blog post on creating a Python + Django (a Python web framework) microservice using an existing Cookiecutter template.
Getting started
1. If you don’t already have Cookiecutter, install the CLI on your local setup. Follow the latest installation instructions.
2. Create a new folder on your local setup with this command:
mkdir PythonTestMicroservice && cd PythonTestMicroservice
3. Clone the template into your newly created folder with this command:
git clone https://github.com/pydanny/cookiecutter-django
In our previous post, we went over the tree structure of a typical Cookiecutter template. You’ll see that what we described is consistent in this template - the directories with {{}} in the names will be filled in based on the inputs provided to the cookiecutter.json file upon creation. In this particular case, {{ cookiecutter.project_slug }} will be replaced with “python-test-microservice” or whatever you decide your “project_slug” will be.
The cookiecutter.json file is the central point of any cookiecutter template. All parameters are defined in this file, and the variables here will be filled out during the service creation flow. You’ll notice that the cookiecutter.json for this template is longer than the template we used for our SpringBoot microservice. The cookiecutter.json file contains basic project information like the name, description, author, & domain name. It also contains configurations, such as the PostgreSQL version, cloud provider, and mail service that the microservice will use.
Creating the Python Microservice
1. From the PythonTestMicroservice folder, run:
cookiecutter cookiecutter-django
You should see a prompt to fill out a few inputs - This is Cookiecutter asking us to fill out the variables of our new app based on the cookiecutter.json file. Since this is a full production-ready template, you can slice & dice the template options however you want. Using this template, you can create a new microservice that supports any combination of the following:
Continuous integration on any of the popular CI tools (Github, Gitlab, Travis CI)
Deployment (Docker, Heroku)
Cloud hosting (AWS, GCP)
Mailing services (Sendgrid, Amazon SES, Mailgun etc.)
2. Fill out the prompts one by one - If you just want to use the defaults, press enter. For example, the default cloud_provider is set to AWS so that’s what will be used if you don’t input anything else. For this specific example, let’s change the use_docker param to y when prompted. Let’s also change the ci_tool to Github (option number 4 in this example)
3. Ensure you have docker setup locally. If you don’t, you can follow the instructions here.
4. cd into the newly created folder, and run docker-compose -f local.yml up
This will spin up all the services defined in the local.yml docker compose file... within a few seconds you’ll have your entire Django microservice up & running locally! If everything went as expected, we’ll see the log statement Serving on http://0.0.0.0:7000 for the docs service, and Development server is running at http://0.0.0.0:8000/ for the django service.
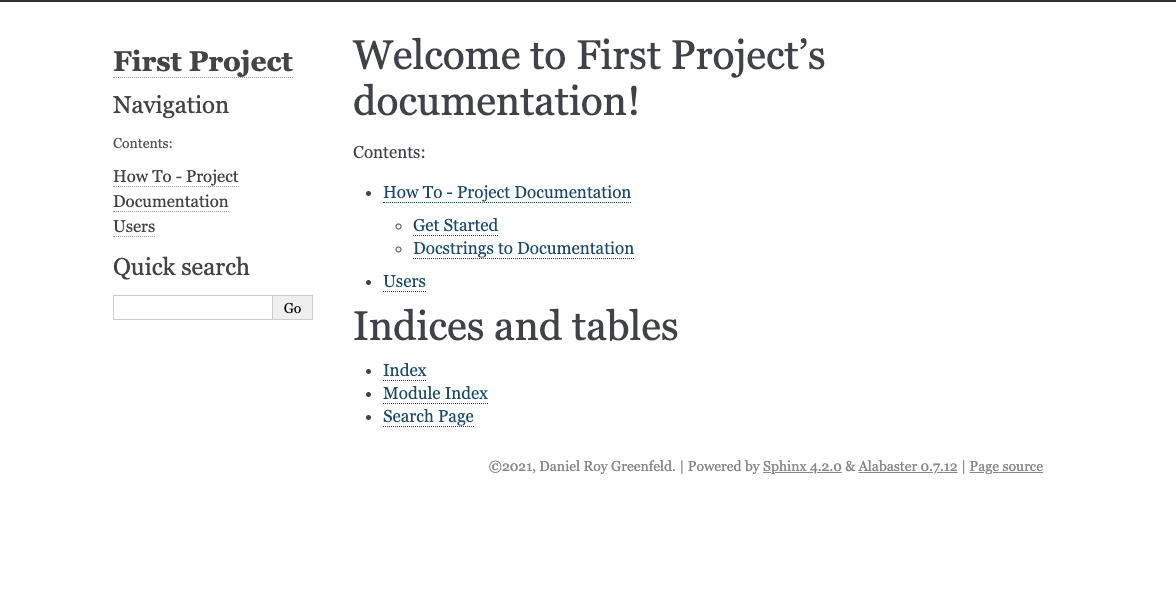
5. Try going to the first link - in our case, it’s http://0.0.0.0:7000. You’ll see an entire docs page scaffolded for your service:
6. Also, try visiting http://0.0.0.0:8000/. You’ll see your service homepage.
Ta-da! Congratulations on creating your first Django microservice using Cookiecutter! If you want to deploy this application to a production environment, you can follow the documentation here.
Hopefully, this was a seamless and painless experience - think of how much longer something like this would’ve taken without having a template to start from or trying to find and replace all instances of the service name in some copy pasted code. Using a template makes standing up a new service significantly easier by removing a number of manual steps for developers while ensuring that you don’t forget critical steps.
Want to get more How To’s for other types of microservices? Subscribe to our blog.


